1. New Windows Update Won’t Install
Here’s how you can deal with this common issue:
Tip #1: Flush out the update files.
The best thing to do in case an update won’t install or gets stuck during download is to flush out the update files.
To do this, press the Windows Key and R to open Run. Then, input ‘C:\Windows\SoftwareDistribution\Download’ and click OK.
Delete everything in the folder, but keep the folder and leave it empty. If some files won’t delete, try booting into Safe Mode.
Once in the Safe Mode, restart your PC and try installing the Windows update again.
Tip #2: Use the Windows Update Troubleshooter.
Windows 10 comes with a built-in troubleshooter. This tool will attempt to detect and resolve any problems related to Windows update.
To access the Windows 10 Update Troubleshooter, open Microsoft’s diagnostic file. Use the system search for “troubleshooting” and then select the relevant result. A window for a Control Panel will open. Under Safety and Security, click ‘Fix problems with Windows Update’ and wait for a new window to open.
On the new window, click ‘Advanced’. After, click ‘Run as administrator’ to find more issues and then click ‘Next’.
The program will then start detecting problems and automatically attempts to repair them. After troubleshooting, the troubleshooter shows the results. You’ll be given the list of problems detected. It will also show the status on whether the troubleshooter has resolved the issues or not.
After using the Windows Update Troubleshooter, reboot your computer. Then, rerun the installation of your Windows update.
Tip #3: Disable your Anti-Virus.
An anti-virus does not normally interfere with the installation of updates. However, disabling it may solve common Windows problems and solutions. To disable your anti-virus, open your anti-virus and then turn it off.
2. Default App Choices Suddenly Changed
Here’s a tip when this issue crops up:
Tip: Change your default settings.
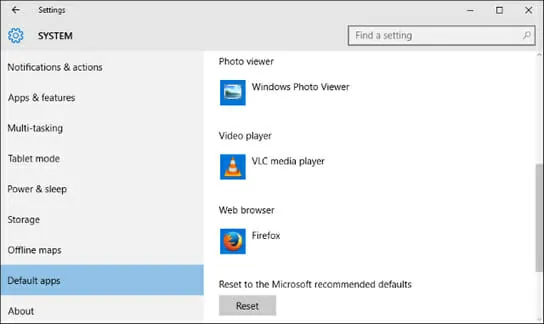
Press Windows Key and “I”, then select ‘System’. After, choose ‘Default apps’ from the left-hand navigation. From there, you can manually change your app for viewing photos, videos, and other file types.
3. Not Enough Space for a Windows Update
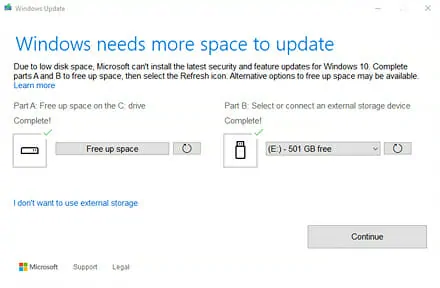
Before you can install a new Windows update, you need to have enough space. Windows will prompt you if you no longer have adequate space on your device for the installation. Here’s an example of a pop-up message you may get should you run out of space:
Tip #1: Use CleanMyPC.
A quick way to free up gigabytes of space is using CleanMyPC. This software can quickly uninstall apps and files. It can also clean up Windows database and delete temporary files.
Tip #2: Auto free up space.
Another way is to free up space on your PC’s hard drive or SSD. To do this, simply use the built-in Disk Cleanup tool. First, click ‘Start’ menu. Then, view ‘All Program’ and click ‘Accessories’. Select ‘System Tools’ and then open ‘Disk Cleanup’. Once opened, choose the files you want to remove and then click OK.
4. Touchpad Not Working
Some people encounter problems with their touchpad after installing Windows 10Creators update. There may be different reasons for this problem. One common cause is software and driver compatibility issues. If you unfortunately came across this problem, you may follow the tips below:
Tips #1: Check your keyboard.
First, check your keyboard and see if there is any problem causing the touchpad to not function. Check if the button for the touchpad is turned on or off. Make sure it’s on.
Tip #2: Try updating Driver Software.
Press Windows Key and X and click on ‘Device Manager’. Expand ‘Mice and other point devices’. Right-click on your touchpad, and then click ‘Update Driver Software’.
5. Windows 10 Doesn’t Find Wi-Fi Connection
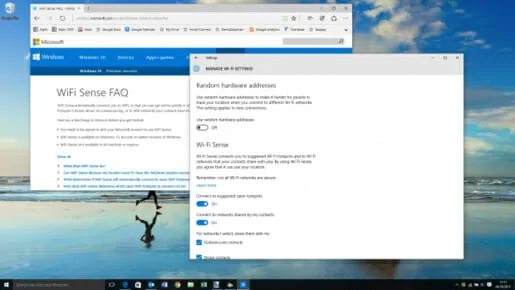
If your PC no longer detects WiFi connection, it may be due to your Windows settings or other programs.
Tip #1: Update your VPN software to the latest version.
If you have installed VPN, it’s important to check if it’s affecting your Windows settings.
Go to your VPN’s official website and update it to its latest version. Check if the updated version is compatible with Windows 10.
Tip #2: Use a Command Prompt.
If the previous tip doesn’t work, use an administrative Command Prompt. To do this, press Windows Key and C and choose ‘Command Prompt (Admin)’. Next, enter the lines below and then press ‘Enter’.
reg delete HKCR\CLSID\{988248f3-a1ad-49bf-9170-676cbbc36ba3} /f
netcfg -v -u dni_dne
After pressing ‘Enter’, try to connect to your Wi-Fi again.
Tip #3: Update your Driver Software.
If you still can’t seem to detect and solve the problem after doing Tip #1 and 2, then the issue may be driver-related. Do a system search for “device manager” and then select the most relevant result. Open a new window and expand ‘Network adapters’. Then, right-click on your wireless adapter, and then select ‘Update Driver Software’.
6. PC Boosts Slowly
Windows 10 starting slowly may be caused by various reasons. Here are some tips to solve this Windows problem.
Tip #1: Check for malware.
Press Windows Key and I. Then, select ‘Update & Security’ and choose Windows Defender. After, click ‘Open Windows Defender and then click ‘Full Scan’.
Tip #2: Disable some startup programs.
Some startup programs may be causing your PC’s boot to slow down. You’re free to disable manually. But you can also use tools like CleanMyPC to easily and quickly remove specific files and file types.
7. Stop Error or Blue Screen of Death
This is probably one of the most serious problems involving Windows 10 update. It particularly happens when using HP laptops and computers. It’s a serious problem as it can terminate the whole Windows operating system. This stop error may happen before or after logging in while booting Windows 10.
The error is either hardware or software related. It could be due to outdated graphics driver or outdated BIOS. It could also be due to malicious software or improperly installed external hardware devices.
The following are some fixes for this problem:
Fix #1: Update your graphics drivers.
There are a lot of reliable driver updaters online like Driver Talent. Software solutions like this can instantly help you determine what’s gone wrong. It could be the graphics driver missing, outdated, corrupted, or broken. It then installs the most suitable Windows 10 graphics driver in minutes.
Fix #2: Check your external hardware devices
Your external hardware devices may be causing the problem. Here’s how to troubleshoot accordingly:
Step 1. Unplug every external device.
Step 2. Reboot the computer.
Step 3. If your computer boots successfully, plug in the devices again. Then, check if the issue still appears.
Fix #3: Scan for viruses.
Use the latest version of a reliable anti-virus software to do the scan.
Fix #4: Update BIOS.
The existing BIOS may not be compatible with the new system. Here’s how to easily update your BIOS:
Step 1: Know what BIOS version your computer has. You can do this by clicking Windows’ Start button. Key in “System Information” in the search box then click System Summary. Under the computer’s processor speed, your BIOS version is displayed.
Step 2: Back up your BIOS
First, you need to back up your BIOS. Your BIOS updater has a built-in “Save” or “Back up” Function.
Step 3: Find the Correct Updates. Just go to the manufacturer’s site then download the accurate BIOS update.
Step 4: Run the downloaded BIOS update.
Step 5: Restart your computer—though some updates just restart the computer automatically.
Windows 10 is an improved version of the Windows operating system. However, it’s still not perfect, so you should not expect it to be completely problem-free. If things go south, use the tips above to solve the most common Windows 10 update problems you may encounter.


 If your PC no longer detects WiFi connection, it may be due to your Windows settings or other programs.


Post a Comment